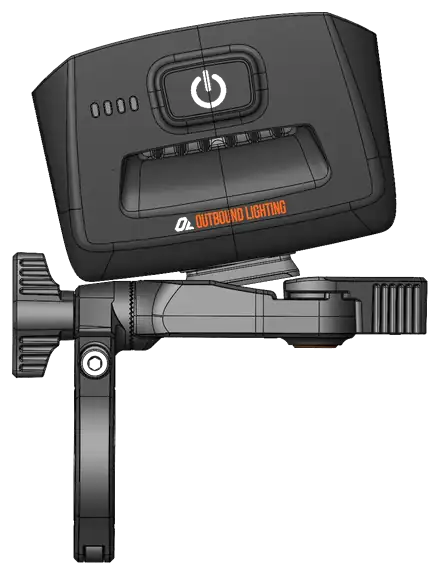
Outbound Lighting
Manual rev. 2026-11

Trail Evo

Powerful Handlebar Light

New light? Mount it first.

Trail Evo

Modes & Runtime

Adaptive2200 lumens tapering to 950
2.6 hours95% to 75% perceived
High2200 lumens
1.7 hours100% perceived
Medium880 lumens
4.2 hours60% perceived
Low400 lumens
8.5 hours30% perceived
Click the power button to cycle Adaptive, High, Medium and Low. The status lights show which mode you are in.

Flash Modes

Hold3 sec from off
Press and hold the power button for 3 seconds from OFF to enter the flash modes. Click to switch between them.
Day StrobeFlashing, for daytime visibility
10 hours
Night PulsePulsing, for night visibility
4.5 hours
Hold the power button for 3 seconds from OFF to enter the flash modes, then click to switch between Day Strobe and Night Pulse.

Runtimes are rated from a full charge and are conservative. Expect roughly 20% less below freezing.

Why do the lumen numbers look low?

Your eyes do not see light linearly. 50% of the lumens does not look half as bright. We tune modes to perceived brightness instead of chasing a lumen spec, so the numbers read lower than you might expect. Trust us.

Battery Status

After you select a mode, the lights show how much battery is left in that mode.

100%all solid
75%
50%
25%
5%slow flash, low mode only
2%rapid flash

Low battery warning

Before it dies, the main light flashes for 10 seconds so you have time to slow down and stop safely.

Charge It

Quick Charging

Trail Evo charges fast on Quick-Charge (QC) USB chargers using the included USB-A to USB-C cord. The status lights animate 1-2-3-4 while charging; a slow animation at first is normal, and it speeds up noticeably once QC is enabled.

How Long

About four hours from empty on a QC charger. 0% to 85% in under three hours. Slower chargers take longer. Full when all four status lights stay on.

Extending Runtime (Powerbanks)

Trail Evo supports pass-through charging, so it can charge while in use. Plug in a QC-rated powerbank, or one capable of 3.0 A at 5 V, at the start of the ride. Do not wait until the light is drained.

Plug in the included USB-C cord. The status lights animate while charging and stay solid when full.

Caution

Do not charge the light while it is wet. Powerbank compatibility varies; test yours before relying on it for a race or a long ride.

Use It

Clickonce
Turns the light on.
Clickagain
Cycles modes: Adaptive, High, Medium, Low.
Hold1 second
Turns the light off.
Hold3 sec from off
Enters Day Strobe and Night Pulse modes.

Adaptive Mode

Starts on high and very slowly reduces power as your eyes adapt to the dark. More runtime without you noticing the change.

Mount It

Handlebar Quick Release Mount

The quick release mount clamps to your handlebar and stays there. The light clips in and out with the cam-lock lever.

Mount It

  1. Check if you need a shim. The mount is designed for 35 mm bars. If you have 31.8 mm bars, use the included shim.
  2. Locate it on your handlebar. Designed to sit to the left of your stem, but it can be flipped to mount on the right side.
  3. Tighten with the M2.5 hex key. Make sure the clamp cannot easily rotate around the bar. Hand tight is enough, no need to crank on the fastener.

Install The Light

  1. Align. Angle the foot of the light into the left side of the shoe.
  2. Pull back. When the light is fully seated, pull it back to depress the plunger. You will feel the lever snap shut.
  3. Press the cam-lock lever down. Light pressure locks the light in place. You don't have to crank on it.
Angle the foot into the shoe, pull back until the lever snaps shut, then press the cam-lock lever down.

Remove It

Pull up on the cam-lock lever until the brass plunger snaps back into place and the light loosens, then slide the light out of the shoe. The mount stays on the bar.

Trouble Fitting It?

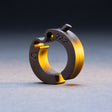
The mount is sized for 35 mm bars and ships with a 31.8 mm shim. Smaller bars need one of the shims below, and the action camera adapter puts the light on any GoPro-style mount.
Fix It

It won't charge

Charging is locked out below freezing to protect the battery. Bring the light inside and let it warm up. Also try a different cable and charger; the included cord is tuned for QC chargers.

The main light flashed, then shut off

That is the 10 second low battery warning. Charge it. If it happens while the status lights still show a high percentage, contact us.

Status lights animate slowly while charging

Normal on a non-QC charger. A full charge will take longer than four hours.

The mount rotates on the bar

Check the bar size. The clamp is made for 35 mm bars; 31.8 mm bars need the included shim, and 25.4 mm or 22.2 mm bars need the matching shim from the accessories list in the Mount section. Then tighten the M2.5 fastener until the clamp cannot be turned by hand.

The light won't click into the mount

Make sure the cam-lock lever is up before you slide the light in. Angle the foot into the left side of the shoe, push it fully forward, then pull back until the lever snaps shut. If the lever will not latch, check for dirt in the shoe.

Runtime is shorter than listed

Cold weather cuts runtime by around 20%. If runtime is far below the rated figure at room temperature, contact us.

Still stuck?

Send us a message through the contact form with your order number and what happened. A human replies, usually the same day.

Care & Feeding

Cleaning

Wipe with a damp cloth. Do not pressure wash.

Best Practices For Charging

Charge whenever you are done riding. No need to run it flat between rides. Do not leave it dead for long periods. Charging is disabled below freezing; warm it up indoors first.

Long Term Storage

Store fully charged, indoors, at room temperature, in a dry spot.

Cold Weather

Expect roughly 20% less runtime below freezing.

Warranty

3 years and beyond

In short: we got you. You should not have to pay out of pocket beyond the initial purchase to keep your light running for at least three years, and we stand behind the product past that.

Our free lifetime extension is the "Don't Be A Dick Warranty Extension Policy." Be kind and honest about what happened and you will be talking to a human who wants you taken care of.

Defective part? We fix it. Crashed head first into a tree? Tell us that and we got you.

Safety

Important safety instructions
Battery and disposal
Trail Evo manual, rev. 2026-11

Thanks for your purchase. We are a small company working hard to make the best bike lights we can. If anything goes wrong, contact us and we will get you taken care of.